The sight of a barista meticulously pouring hot water over a cone-shaped bed of coffee just to make a single mug might seem like overkill or even outright ridiculous to most people. However, the skepticism quickly fades the moment you bring the cup to your lips and experience the taste of pour over coffee for yourself.
This guide is designed to shed some much-needed light on the pour over method and offer indispensable tips that’ll give you a great cup of coffee.
See our video guide below in our step-by-step!

Table of Contents
What’s so Special about the Pour Over Method Anyways?
As a coffee lover, you’ve probably noticed that the pour over method has recently burst into the mainstream coffee scene. It’s especially common in high-end cafés and specialty coffee shops. So, what is so darn special about this method?
Most experienced baristas prefer the pour over method – and for good reason. The short but vague answer is that there’s a certain advantage this brewing technique leverages. But I bet that explanation doesn’t cut it for you, does it? Here are some of the main perks of using the pour over method:
- Control: This method is revered because of the level of control it awards the brewer. You can micromanage nearly every step of the brewing process from the strength and flavor to the water temperature and grind of the coffee beans.
- Flavor Profile: The pour over method yields intricate flavors and aromas better than other brewing methods. So if you have a batch of single-origin coffee, this is your best bet at enjoying its unique characteristics.
- Efficiency: Similar to other infusion methods, the extraction of coffee solubles is more efficient compared to immersion techniques (such as the French press). This is attributed to the constant flow of fresh water.
- Consistency: Do you love a clean and clear cup? Fragrances and oils are extracted gradually and consistently before – while most of the oils are filtered out.
PS: Just like any other manual method, the quality of a pour over is subject to human error. You run the risk of channeling – whereby the poured water finds an easy route in the coffee bed due to unevenly distributed coffee grounds.
What Equipment do You Need?
As consumers continue to pay more attention to the intricacies of their daily coffee, so does their interest increase in the brewing methods that bring the best out of their coffee grounds. So, how do you brew a great cup of Joe? It boils to both the process and equipment in your coffee-making arsenal.
Due to the precise and manual nature of this particular brewing style, you might need more equipment than you’d typically use to brew coffee.

For optimal extraction using the pour over method, you’ll need a burr grinder, paper filters, a gooseneck kettle, quality beans (light roast), a carafe/decanter, timer, coffee scale, and a pour over coffee maker.
The Best Pour Over Coffee Makers – A Buyer’s Guide
“The best investment is in the tools of one’s own trade,”
– Benjamin Franklin
As pour over coffee gains traction in the coffee industry, more and more pour over brewers are being manufactured and released into the market. Whether it’s your first purchase or you’re looking for a replacement, finding the best pour over coffee maker can be a daunting task.
The journey to finding the best equipment starts with understanding your personal needs and characteristics. What are you looking for in a pour over coffee maker? You need to factor in portability, the skills required, budget, the number of cups to brew, the material its made of, and the effort required to brew with it. To get you started, here are some of the best-performing and most popular pour over coffee makers on the market today.
- The Hario V60 Coffee Dripper

The Hario V60 is arguably the face of pour over coffee brewers. The iconic coffee maker is often on display in specialty shops and high-end cafés around the globe. It comes in several materials, including copper, plastic, steel, glass, and ceramic. As a cherry on top, it comes in different colors and sizes to meet your specific taste.
How do you use the Hario V60? Rinse the filter with hot water, add coffee, and start the timer. Gently pour up to 15% of the brewing water evenly over the bed of coffee grounds. Then wait for 30 seconds before adding the remaining water. For best results, start pouring from the center and move outwards in concentric circles. The brew time ranges from 2 to 6 minutes, depending on the brew size. PS: Due to the brewer’s concave flow and large single hole, you must be attentive to the pacing and timing of each pour.
What are the advantages? The ridged design of the coffee maker helps facilitate consistent and clean extraction. Besides, it’s one of the most popular pour-over brewers among baristas – and that ought to tell you something about its efficiency.
What are the disadvantages? Brewing with the Hario V60 demands a meticulous routine and a high level of skill – i.e., it has a steep learning curve. However, don’t let that discourage you- it can serve as an excellent opportunity to learn what variables affect brew quality.
- Kalita Wave 185 Dripper

Looking for a well-rounded brewer? Consider the Kalita Wave Dripper. It’s nearly as popular as the Hario V60, but easier to use! The Kalita Wave is characterized by a wave design in the interior walls and a flat base with three outlets. It’s available in stainless steel, glass, and ceramic.
How do you use the Kalita Wave 185? The coffee maker works in a similar manner to the Hario V60, but with less technical precision. While pouring the water, remember to maintain the water level at 1-2 centimeters below the brewer’s brim. Although it’s forgiving to inexperienced users, ensure you use a deeper coffee bed and avoid pouring onto the ridges.
What are the advantages? The Kalita Wave is one of the best coffee makers at drawing out rich and complex flavors from the coffee- the results are what you’d expect from a high-end café. It’s also easy to use and produces a consistent extraction. It’s beginner-friendly, portable, and designed for reliability.
What are the disadvantages? The greatest flaw of the Kalita Wave is arguably the hassle of finding its proprietary wavy filters. As a Japanese import, they are relatively expensive and hard to come by, so it is wise to stock up on the filters when you order the coffee maker. Some users might also feel frustrated by the low volume that limits the quantity of coffee grounds usable during a brewing.
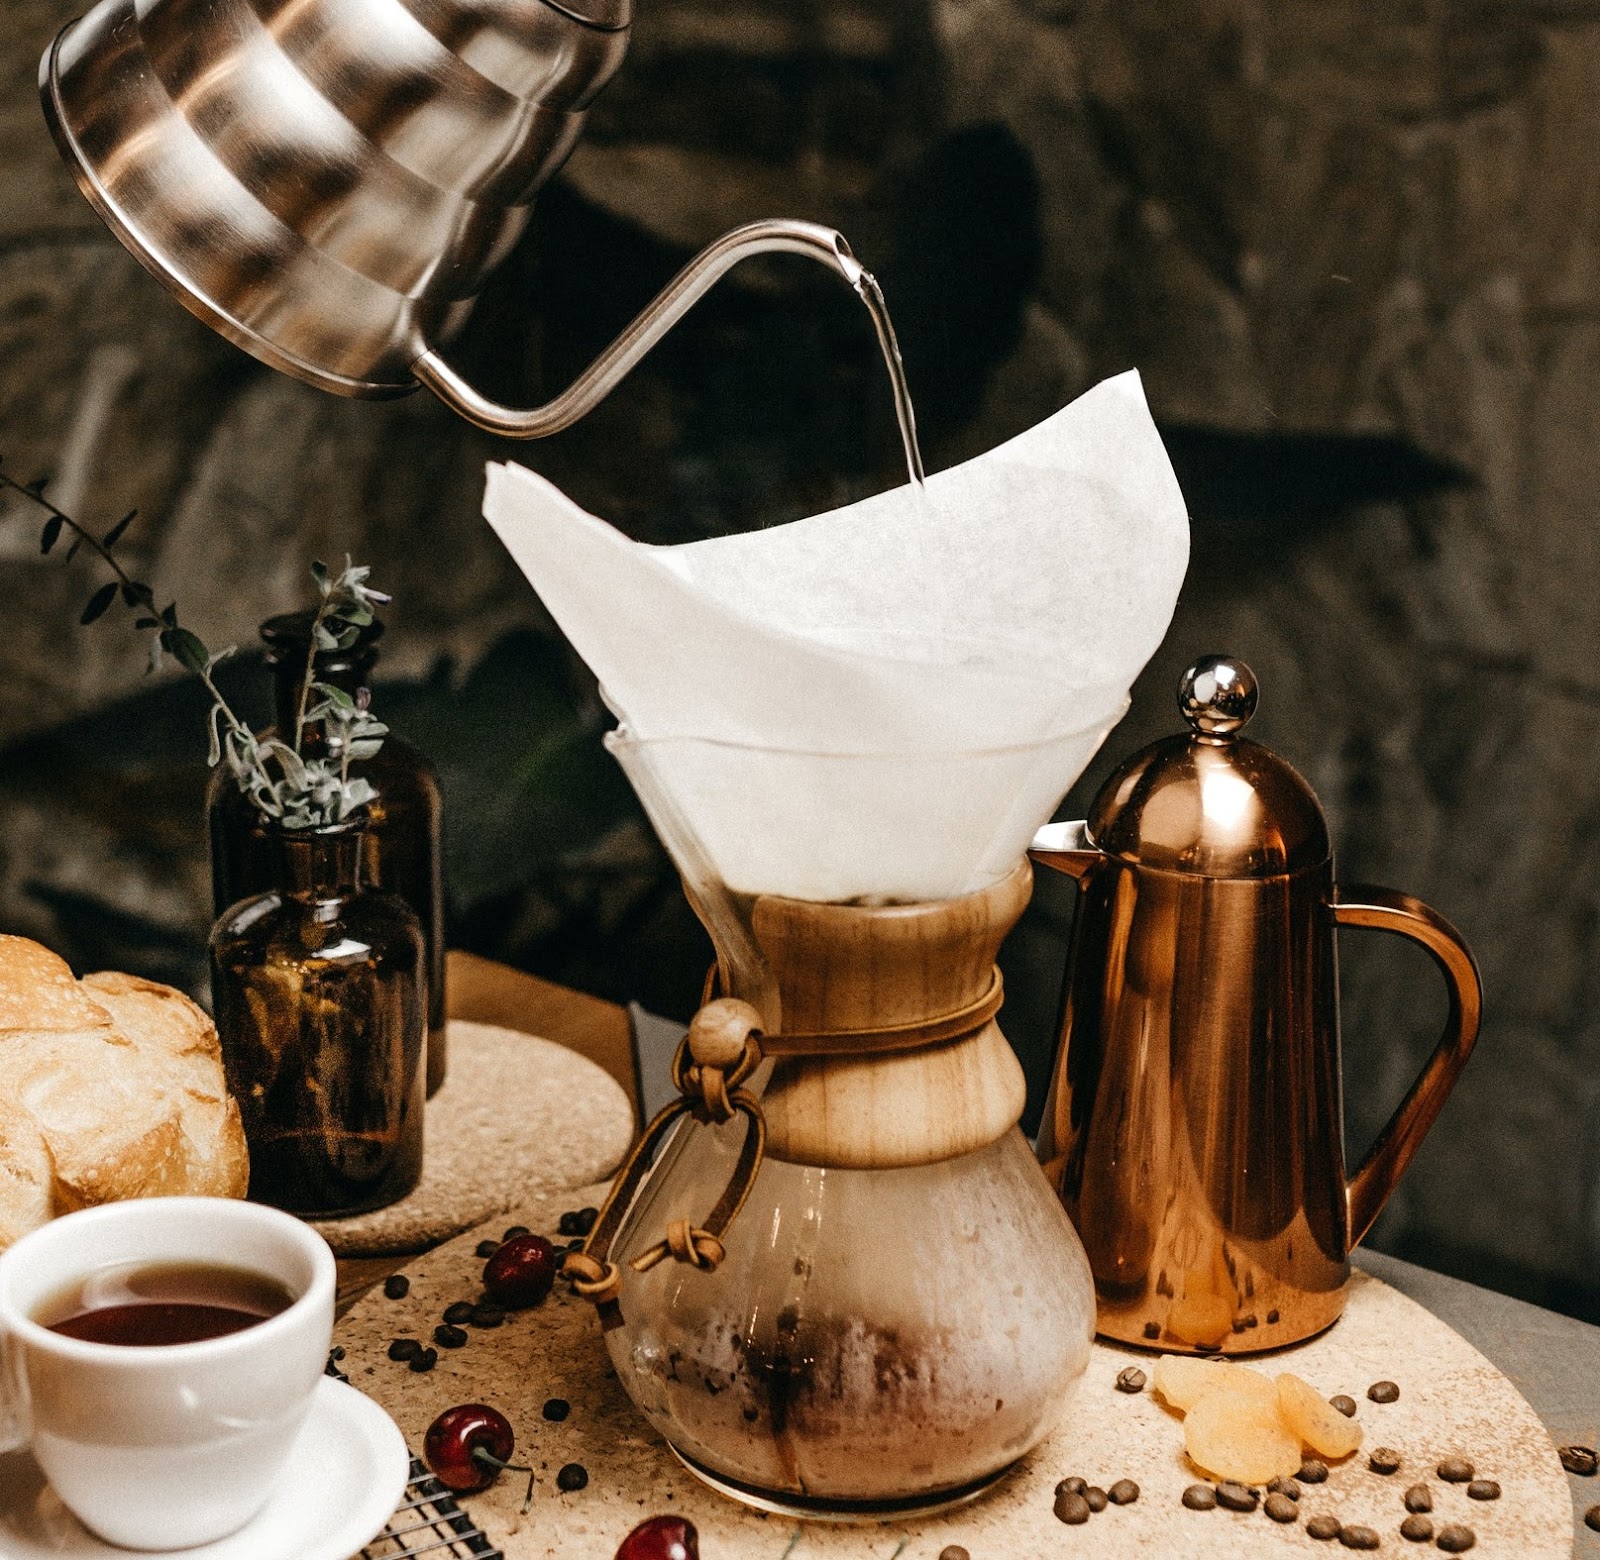
- Chemex

Did you know that the Chemex is listed in the Museum of Modern Art’s permanent design collection? So putting it on display in your kitchen should attract a fair share of admirers. And it’s easy to see why. Its unibody borosilicate decanter, wooden collar, and glass cone gives the coffee maker a classic and stylish look.
What are the advantages? The proprietary paper filters deliver one of the cleanest and lightest-bodied cups. The long contact time and slow flow rate optimize the extraction process for a full flavor spectrum. It’s also has a large capacity.
What are the disadvantages? The Chemex is a notoriously picky device when it comes to achieving the right extraction. Also, the Chemex pitcher’s narrow neck is hard to get through and it might require some special cleaning.
Considering its large size and all-glass design, the Chemex is not really a portable appliance. Additionally, breaking either the decanter or the brewer means disposing of the entire coffee maker.
- Bee House Ceramic

Looking for an easy-to-find, affordable, and well-rounded pour over coffee maker? It doesn’t get better than the Bee House Ceramic Coffee Dripper. This ceramic Japanese appliance delivers a tasty brew with little-to-no hard work. It also comes in two sizes: small (2 cups) and large (4 cups).
What are the advantages? Unlike its competitors, this brewer is compatible with standard cone coffee filters. This means that you can easily find filters in a general grocery store. The Bee House also has a more forgiving learning curve than typical conical brewers.
What are the disadvantages? As convenient as the Bee House sounds, it’s not the best pour over coffee maker if you’re looking for a potent and rich flavor. It’s not as effective at capturing a coffee’s depth and range of flavors as the Chemex, Hario V60, or Kalita wave. Its ease of use also means you compromise on your level of control over the process.
- Coffee Gator Pour Over Coffee Maker

Brewing great coffee and looking cool while being environmentally friendly, the Coffee Gator is a no-frills, practical pour over entry point. It even comes in a convenient all-in-one (dripper, decanter, and filter) package. In addition, the Gator’s dripper has a detachable filter, which is made of stainless steel, unlike the other brewers found on this list.
What are the advantages of Coffee Gator? The brewed coffee is characterized by a bold and full-bodied flavor profile. The permanent metal filter extracts more flavor than a paper filter, leaves a minimal residue, and lasts longer. The glass decanter is also relatively easy to clean.
What are the disadvantages? The only notable downsides of the Coffee Gator are its fragility and small brew size (1-2 cups). If you’ve got a few guests over, you’re better off using the Chemex. It also likely has slightly less top-end pour over potential for skilled users.
Let’s brew it! Step-by-Step Pour Over Instructions
The next part of our pour over coffee guide is the fun part: how you can prepare pour over coffee at home! So, without further ado, let’s get started! Once you’ve chosen your preferred beans, water, and pour over coffee maker, it’s time to get to brewin’!
- Boil your water in your kettle—preferably a gooseneck kettle for the control it gives you—with at least 20 ounces in your kettle. Then let it stand for 30 seconds. This should bring the temperature to 200 degrees F.
- Grind your chosen beans. You want to grind the coffee to the coarseness of sand, and remember to grind your beans fresh and to prepare as much grounds as you are going to use in a brewing.
- Place a paper filter into whichever type of coffee maker you have chosen. With many types of coffee makers it is usually suggested to dampen the filter slightly before placing your precious grounds.
- Fold down the seam of the paper filter and place it into the pour over cone so that it lies flat.
- Put the pour over onto your scale if you’re using one (reservoir attached if you are using a V60 style) and pour your grounds into the paper filter and then zero the scale.
- Now, evenly and slowly, pour water over the grounds (about 60g/60mL over about 15 seconds). You will then experience the magical effect known as the coffee “bloom”- the grounds will rise up like a muffin and usually release a fine aroma. This is the carbon dioxide being released from the beans. Wait 30 seconds before pouring again.
- After 30 seconds are up, start pouring slowly in a spiral motion starting from the center and going outwards. Pour about 90g (90mL) of water over another 15 seconds. Make sure to keep pouring slowly and evenly over the grounds. Go too fast and the coffee maker may flood! Wait for 50 seconds to a minute.
- Pour an additional 100 mL of water over another 20 seconds.
- Pour 100g/100 mL more over another 20 seconds. Let the water completely filter through the pour over.
- Remove the coffee maker and filter. Clean the coffee maker and dispose of the paper filter and grounds properly (you can save the grounds for the garden, composting, or use as an exfoliate!).
- My favorite part! Enjoy your fresh and delicious pour over coffee!

Tips for Brewing the Perfect Cup of Pour Over Coffee
“It is essential to have good tools, but it is also essential that the tools should be used in the right way,”
– Wallace D. Wattles, Celebrated American author
Sure, you might have the best pour over coffee maker, but do you know how to leverage its perks to make a great cup of coffee? Keep in mind that you neither have an automatic timer nor a magic button to control the brewing process – it’s all up to you! Here are a few tips to note the next time to decide to indulge in a DIY cup of pour over coffee.
- Water Quality and Temperature: As with any coffee brewing method, water plays a crucial role in the extraction process. Used distilled water with re-added minerals – either via Third Wave Water or by using our guide to making the best brewing water. It’s also highly advisable to maintain the water temperature between 90-96 degrees Celsius (195-212 Fahrenheit). This prevents the under extraction of the grounds.
- The Right Grind: Use a high-quality burr grinder to grind the roasted beans at home. The grind size should be medium coarse – somewhere between a French press and an espresso grind. Finally, ensure the coffee grounds are distributed evenly inside the filter, as this optimizes extraction and reduces the risk of channeling. Check out our guide to coffee grinding if you have any doubts about grind size.
- Pre-Wet the Filter: Take out the filter and place it in the dripper. Now pour some boiled water to saturate the filter papers. This preheats the pour and cleans the filter of its chemical or paper residue that, if left, can produce some undesirable paper notes in your coffee.
- Pour for Bloom: For optimal extraction, the carbon dioxide in coffee must be allowed to escape before pouring in the water. This is achieved by pouring around 30 grams of water in a spiral motion over the coffee bed (starting from the center). In a few seconds, you’ll notice that the beans appear to “bloom”, or expand. For a pouring primer, see our guide on correct pour over technique!
- Coffee-to-Water Ratio: Great brewing is all about striking a balance. The generally accepted ratio is 1:17 depending on factors that affect the extraction process.
Coffee for You, Your Way

One of the best parts about pour over is the sense of individuality that comes with each brew. You can prepare your coffee iced, cold-brewed, or hot; it’s suitable for any style you’d like. You can make your coffee using the aromatic Yirgacheffe, a vivacious Guatemala, or a robust Indonesia. I brewed a Brazilian Cerrado earlier with my little brown ceramic filter- it was fun from beginning to end! From grinding of the beans to drinking the last drop of the coffee itself, the experience was superb. And what made it so good was that it was coffee just the way I wanted it to be, exactly my way! Hopefully this pour over coffee guide encourages you to go try it for yourself! So what are you waiting for?